 |
| Rose Window Block - 12.5"x12.5" |
 | ||
| Fabric especially for the QuiltCon Block Challenge by Che'FAB |
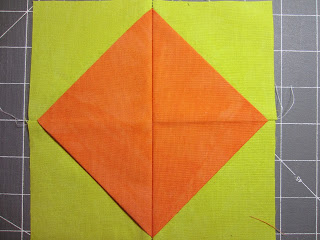
6 Flying Geese units
- 2 sewn together for the center
- 4 one for each side
 |
| 1 of the side flying geese |
4 Corner Flying Geese units
 |
| 2 of the corner flying geese units |
Fabric needed:
For the center of the block you will need
(4) 3 1/2" squares for the background color
(2) 3 1/2" x 6 1/2" rectangles for the edge the shows around the flying geese
(1) 3 1/2" square for the inner part of the flying geese (that will be sewn together to form the very center of the block)
For the flying geese on each side of the block
(8) 3 1/2" squares for the background color
(4) 3 1/2" x 6 1/2" rectangles for the edge the shows around the flying geese
(2) 4" squares for the inner part of the flying geese - cut diagonally in half (note: I have enlarged this piece to make it easier to cover the inner part of the flying geese)
For the corner units
(4) 4" squares for the background color - cut diagonally in half.
(4) 3 1/2" squares for the edge that shows around the flying geese
(4) 3 1/2" squares for the inner part of the flying geese. These will be cut down later.
Constructing the flying geese for the center and sides of the block
Use (2) of the 3 1/2" background squares to "sandwich" the 3 1/2" x 6 1/2" rectangle. The top of the folded edge should be 1/4" from the top of the squares, as seen below.
Sew up along the side of this unit.
 |
| Open the "sandwich" |
 |
| Fold open to form the flying geese, press. |
 |
| Press the seam open, to help reduce some of the bulk. |
 |
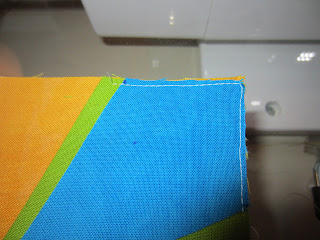
| Stitch barely 1/8" from the edge, you don't want this to show after construction of the block. |
Now, fold the edge fabric around the inner fabric, glue and press.
 |
| Elmer's washable glue stick. It works so much better than pins. |
 |
| Try to get the glue to to edge, without getting it on the background fabric. |
 |
| Press down the edges |
 | ||
| Top stitch the edge down. To keep the stitching even, line up a part of your presser foot with the edge of the fold. I lined the edge with the edge of the plastic part of my presser foot. |
 |
| Start with the background half square triangles (HST, 4" squares cut on the diagonal) and the 3 1/2" square for the edge that shows around the flying geese. |
 |
| Fold the square in half, keeping it 1/4" from the top, sandwich in between the HSTs |
 |
| Sew the square back together |
 |
| Open the "sandwich" |
 |
| Fold open and press |
 |
| This corner unit will need to be trimmed to 3 1/2" x 3 1/2". Trim across the bottom edges. |
 |
| All trimmed |
 |
| Cut your inner fabric by measuring up from the corners 1 1/2" and down from the top 1" |
 |
| Stay stitch |
 |
| Fold, glue, press and top stitch. Note: be careful to keep the edge fabric bottom edges within the 1/4" seam allowance or it will show after you construct the block. |
Sew the units together into 3 sections. Then sew the three sections together!
 |
| Voila' - The Rose Window block! |

Color Me Quilty!
Pat
P.S. Don't forget to join me and link up for Quilty Embellishment Day on the 15th (Next Tuesday). I have a great guest blogger - Jenny Pedigo from Sew Kind of Wonderful!


Oh my word! This block is so beautiful and stunning! What a fantastic tutorial! I am a bit intimidated by such a complicated block but the results sure seem worth it! Great inspiration!! Thanks for sharing!!!
ReplyDeleteMan, And I thought I loved the first one!!! So awesome!!! It will be so fab for quilt con!!
ReplyDeleteThis is stunning!
ReplyDeleteThank you for showing us.
This is amazing!! Pure talent, woman!!
ReplyDelete